
 Since my two basket-making students have about two hours of work left on their sewing baskets, I will spend the rest of their second day teaching each how to make a market basket.
To prepare for this, I practiced by making one myself. First I sanded and waxed the "D" handle shown here. I will prepare the handles for the students too.
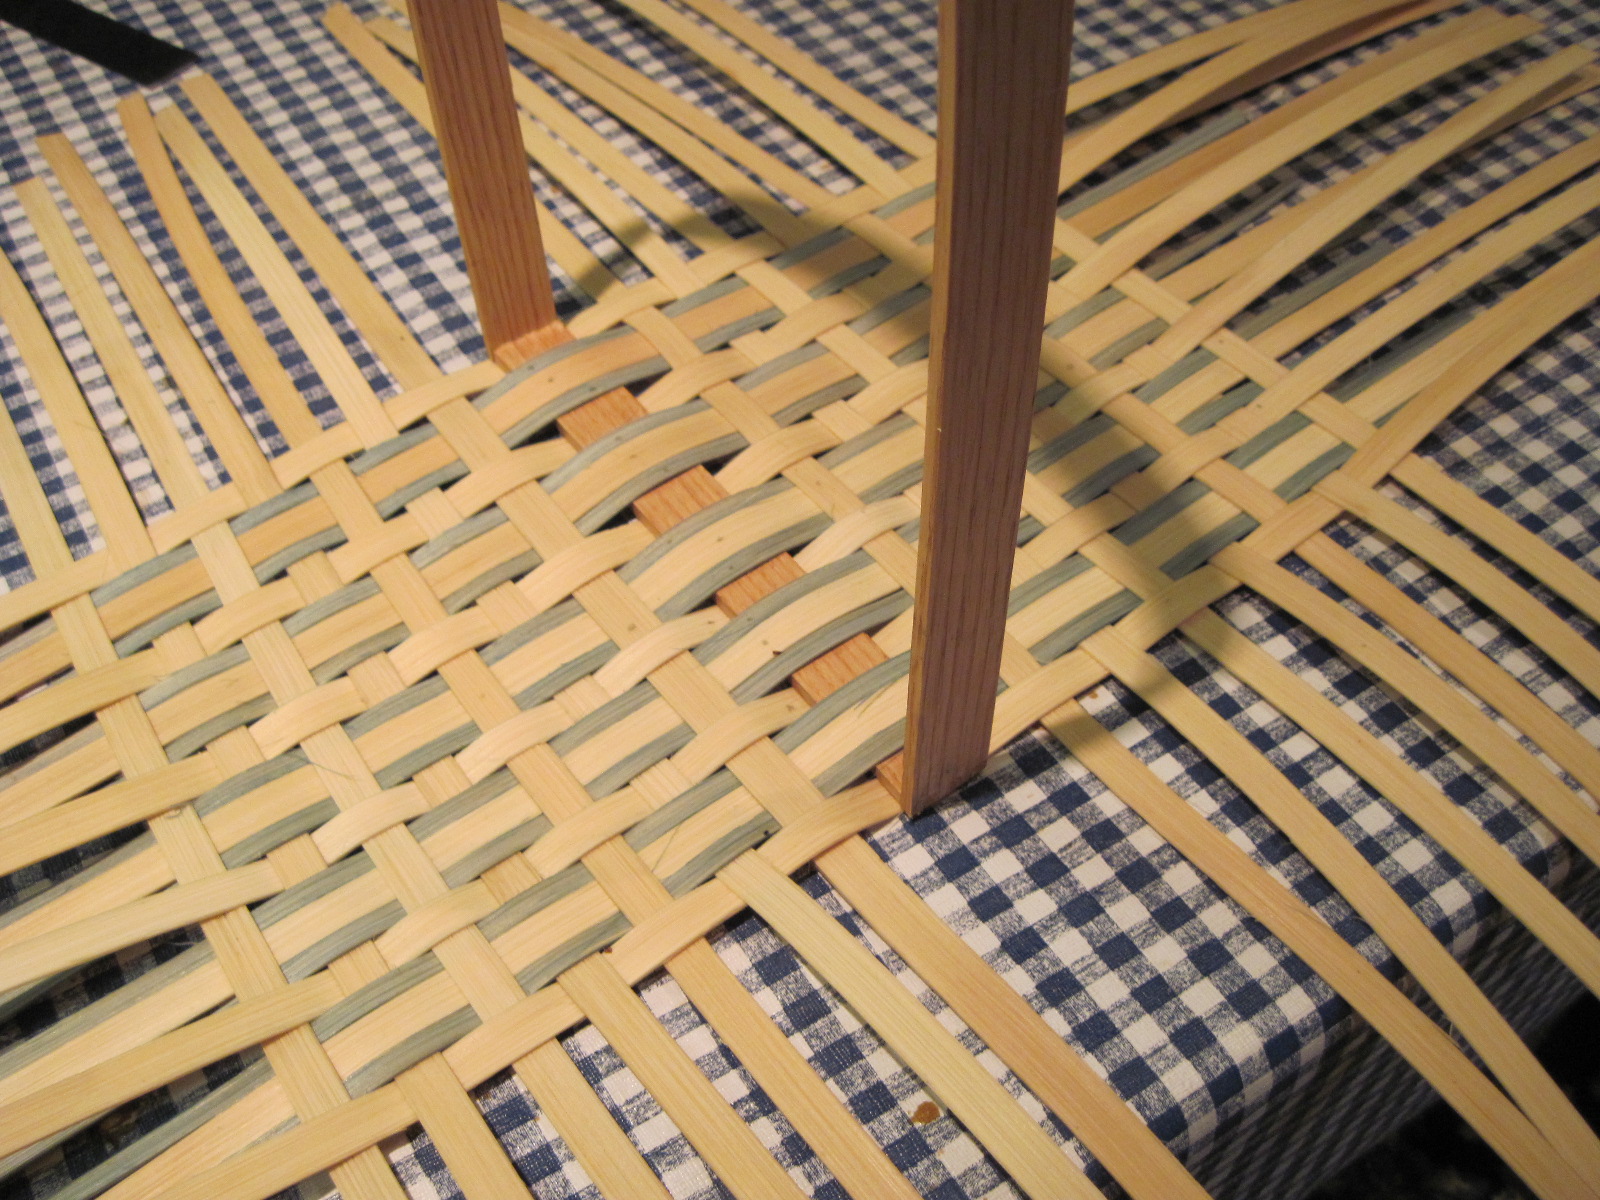
Next I cut the weavers and fillers to size, determined the rough and smooth sides, and then marked the middle point of each weaver. Following this, I soaked the weavers and then wove them into the base as shown. For the fillers I chose 1/4" cane, dyed blue.

I then bent each of the weavers against a straight edge before weaving three rows to begin the sides. Three rows of the 1/4" blue were then added followed by three more rows of weaving. At this point I cut off the inside vertical weavers .

After bending the remaining vertical weavers to the inside of the basket and tucking them in, I began to work on the rim. The clothes pins hold a round of flat cane on the inside of the basket, a second round on the outside, and a filler of cord. This rim was lashed into place with the 1/4" flat cane with the help of the "lash buddy." The lash buddy here has red cord at its near end.
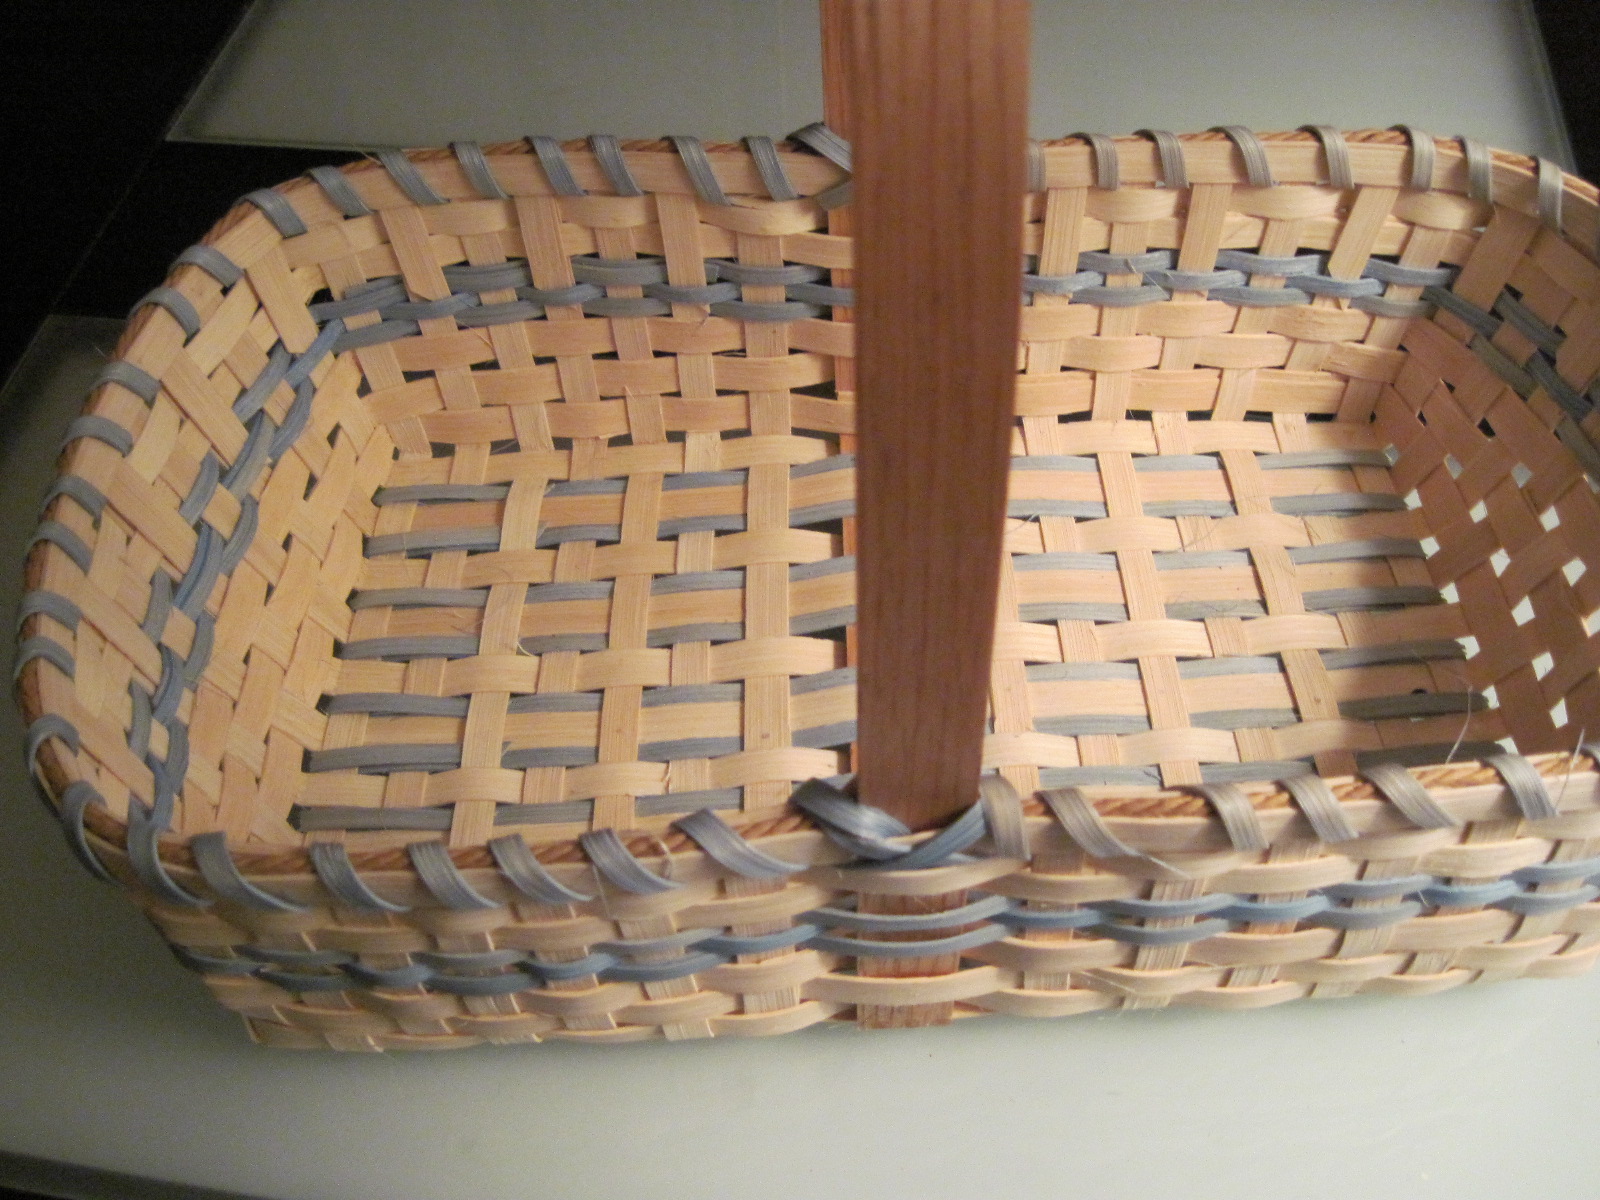
The finished basket looks fine!
It looks lovely.
ReplyDeleteHope you had a Happy Thanksgiving!
Nancy