Showing posts with label bread basket. Show all posts

Saturday, August 21, 2010

Bread and bread baskets

The two baskets shown here were made for a custom order as "bread baskets." The customer specified the dimensions and shape of each basket as well as the decorative elements. In the first example, light blue or baby blue flat cane is combined with Tamarack bark for the decoration. The liner here is one borrowed from one of my sewing baskets. Anne is to make liners for each very soon. The featured bread here is artisan sourdough bread from the local Kanata Farmers' Market.


The bread featured in this oval basket is Anne's homemade bread. This one in a 1.5lb loaf.

The custom order here asked for baby girl pink as well as the Tamarack bark.

Sunday, August 15, 2010

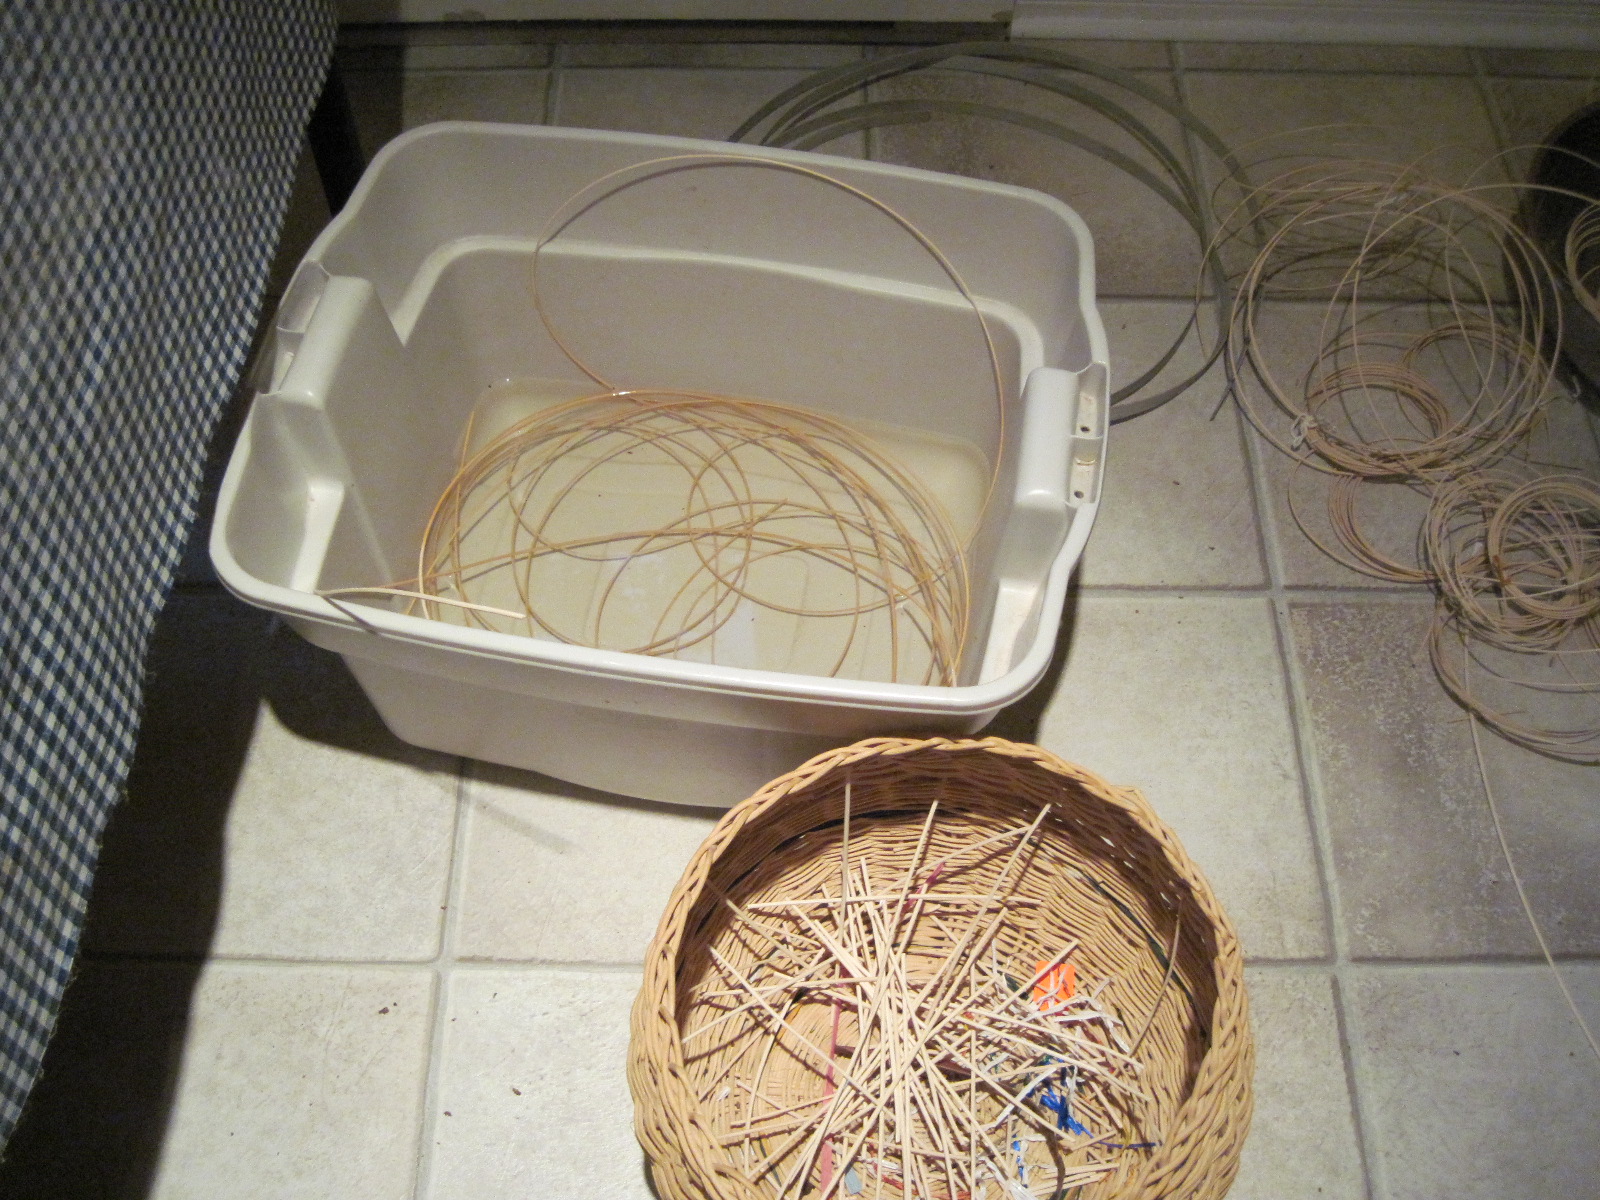
The "tools" used in making a custom order bread basket.

Yesterday, I received a custom order to make two bread baskets with liners. One is to be round as shown in the photo here. The second is to be elongated and suitable for a baguette. Each has to be a particular size, and decorated with particular colours. This one had to have light blue colour bands as well as a band of Tamarack bark. Anne will purchase some linen from which to make the liner for this and the other one I will make later this week.


"Tools" needed to make such a basket include the plastic tote shown here in which to soak the cane. The waste basket by its side is one of the earliest baskets I ever made. I use it to collect the cut-off ends of the cane as I weave.


Unlike many basket weavers, I weave at a table. When we visited a basket-making business in Somerset, the weavers sat on the floor and used a lap board on which to weave.

The remaining "tools" I used for this basket are shown here. Skeins of cane are essential, as is the half house brick. The latter is use as a weight that sits on the basket base as I weave the upsett. The scissors are used for cutting the cane into manageable lengths.
The awl or bodkin is used to pierce the beginning lengths of cane so that, in this case, I could thread five eight inch lengths of cane through four of similar length. The plastic foot ruler had two uses: as a protector of the table surface as I pierced the cane, and as a ruler to make sure I wove to the dimensions requested.

The red-handled snips were used to cut the lengths of cane I used for the stakes of the basket. Those snips can cut through a dozen or more pieces of cane at once. The blue-handled bead snips were used to trim all joins on the inside of the basket, to trim the spokes of the base before adding the stakes to that base, and to trim the ends of the border stakes.

The needle-nosed pliers were used to crush the fibres of the stakes before turning these to the vertical at the upsett stage of beginning to weave the sides. The cord was used to tie these upsett stakes together as the weaving of the sides began.

Last, but just as important as a tool, is the spray bottle used to keep the stakes damp enough to bend at the final stage of weaving, the weaving of the border.

Friday, June 11, 2010

Mark V of Wanda's Two Loaf Basket: the Reveal

Wanda's two-loaf bread basket is now finished! It took three weeks of frustration and several false starts, but I am happy with the final result. I just hope that Wanda is too.

As you may recall from earlier blogs, the base went well. However the first version of weaving the sides was not satisfactory since the sides sloped out too much. The Mark II version of the sides, with thicker stakes, proved to be much more vertical. All I had to do then was to weave a lid.

It took three attempts before I became satisfied with a suitable lid. The first attempt, Mark III, was a duplication of the base, using flat cane. It was difficult to get this to the dimensions of the opening of the basket. And, when I sat it on the top of the basket it just did not look right. It was too flimsy and just did not sit right. Mark III became an addition to the compost-recycling Green Bin!


Mark IV was woven, like Mark V, with an oval beginning. Oval bases are not my forte. I have woven less than a handful in my career as a basket-maker. In the Mark IV version I re-learned that I should never rely on my memory for the "tricks" that make the difference between success and disaster. When the incorrect weave is used, an oval base becomes unmanageable, with uneven ups and downs that no amount of soaking and weighing down with rocks can remedy. One more item for the green bin.

The Mark V version was woven following the instructions of one of my library of books about basket-weaving. Instead of weaving with two weavers (twining), or with three (three-rod waling) the correct weave is with one weaver, and a particular weave called "Japanese Weave." Its is an "over two and under one weave." This proved to produce a base that was easy to flatten and then dome! Surprise, surprise.

Once the oval had reached close to the size of the opening of the basket, I then wove a "packing weave" to change the oval shape to rectangular. I finished with three-rod waling, the upset and a border. The ceramic knob is a final finishing touch.

Thursday, June 3, 2010

Wanda's two loaf bread basket: part 2.

The first attempt at weaving the upsett and sides of this basket was not satisfactory. Because I used stakes that were the same thickness as the weavers, I was unable to control how the sides formed to the degree I wanted. So, yesterday, I unwound the sides to the first five rows of weaving and started again. This time I inserted thicker stakes into those five rows and recommenced weaving. As you can see, the results were much more successful with the sides being almost vertical.

The base and sides work together quite well.


The decorative element is made from three rod waling with two rods in natural and one in the dark green favoured by Wanda. I alternated rows of three rod waling and reverse waling to obtain this arrow pattern. The number of stakes for such a pattern must be dividable by three. Wanda happened to visit when the basket, without its lid, was almost finished. She quite likes the results so far.


Now she wants a hinged lid made in a similar fashion to the base to sit on top of the basket. Here is the beginning of that lid. I placed the basket upside down on the board shown here, and traced its outline. I then put two parallel rows of nails around that tracing and added soaked thick cane between the rows of nails. After it has dried and taken on the shape, I will bind the two ends together. All I have to do now is to figure out how to weave the lid!